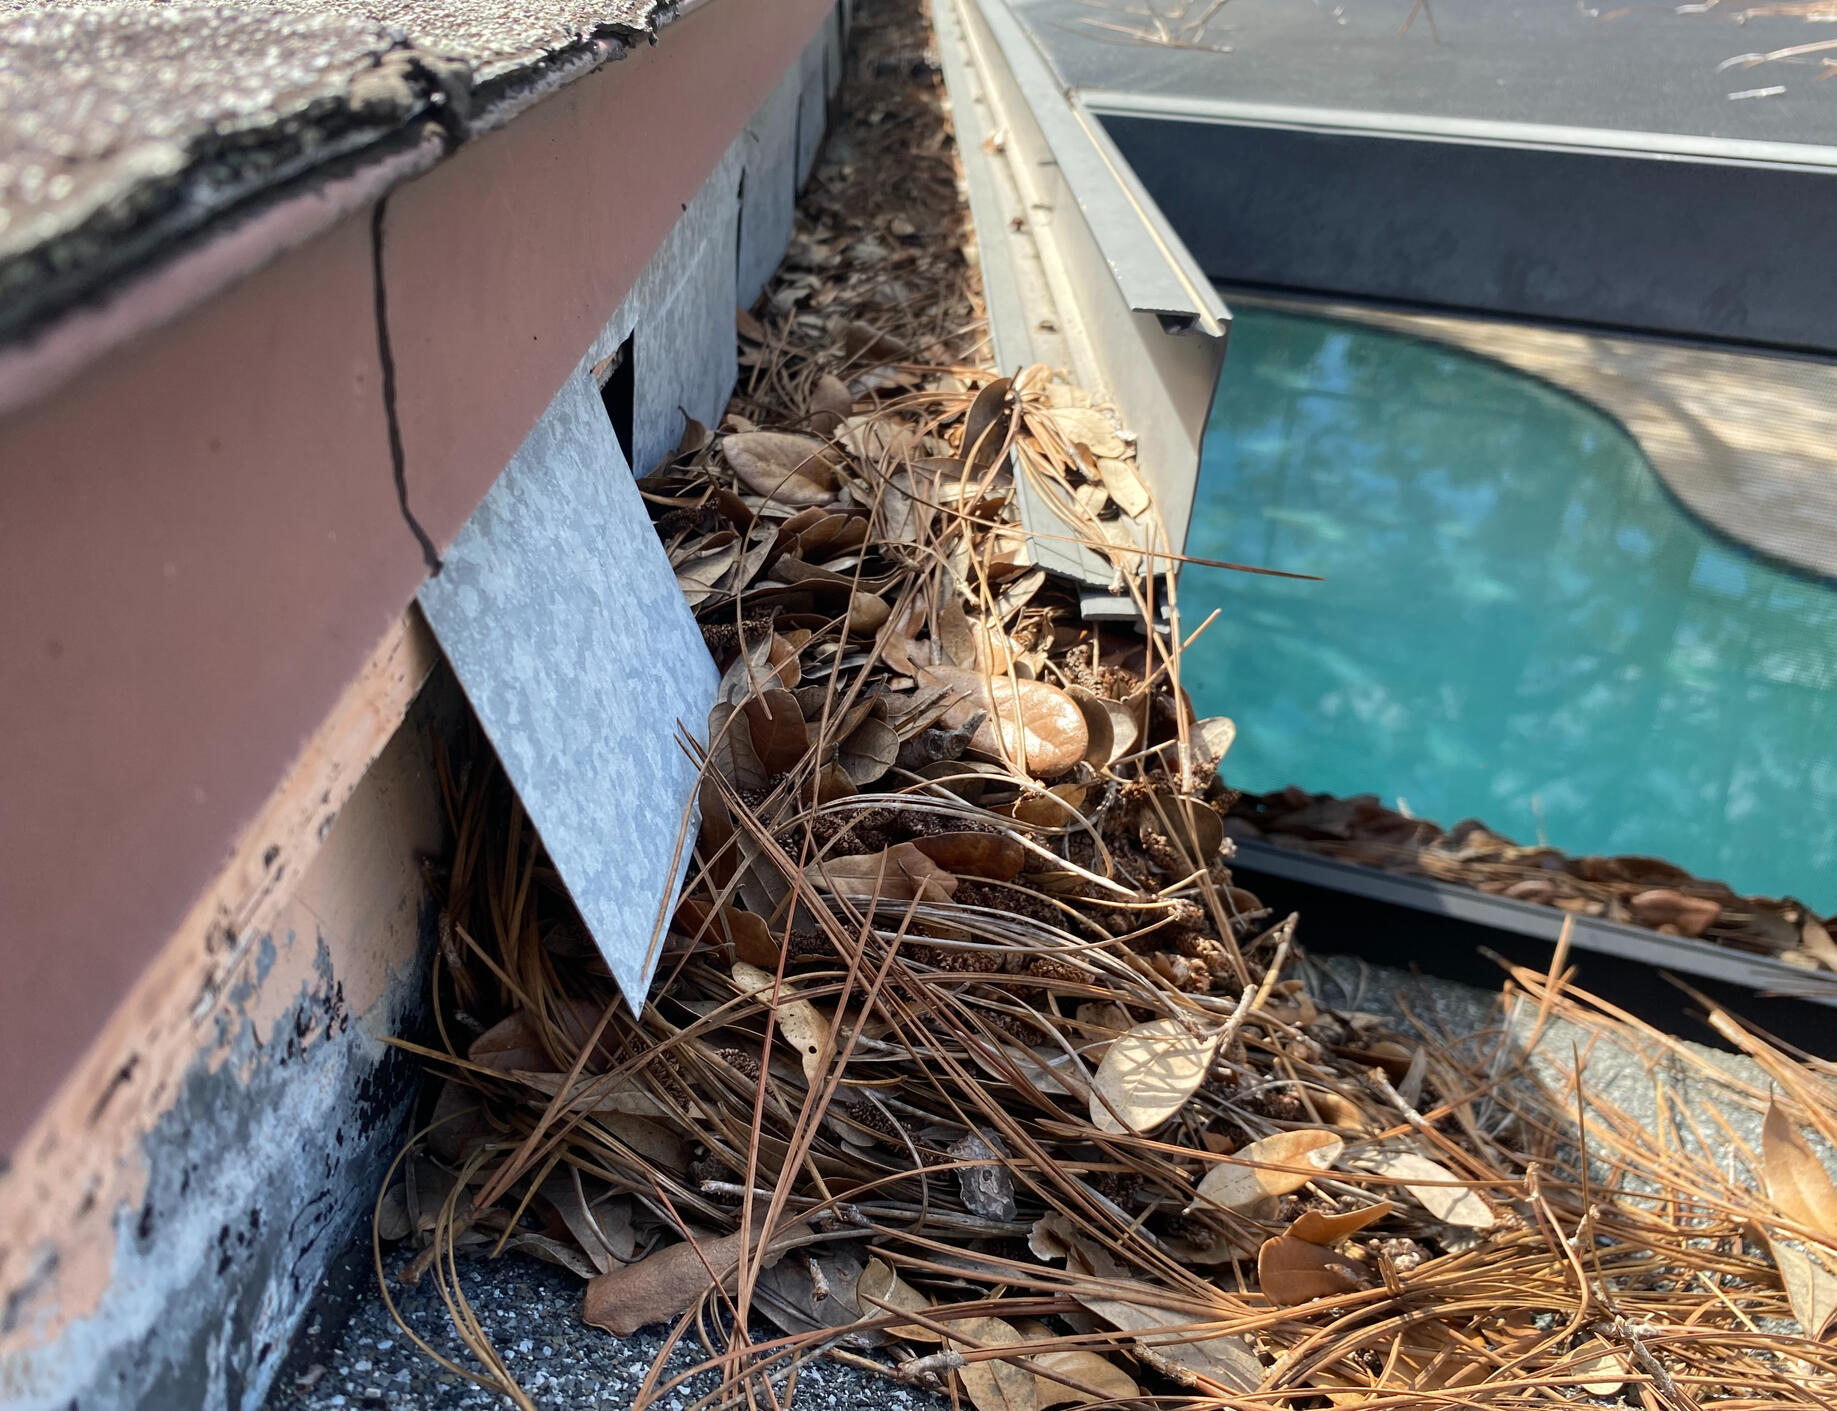
Gutters filled with debris

Why Are My Outside Walls Cracking and Stucco Crumbling?

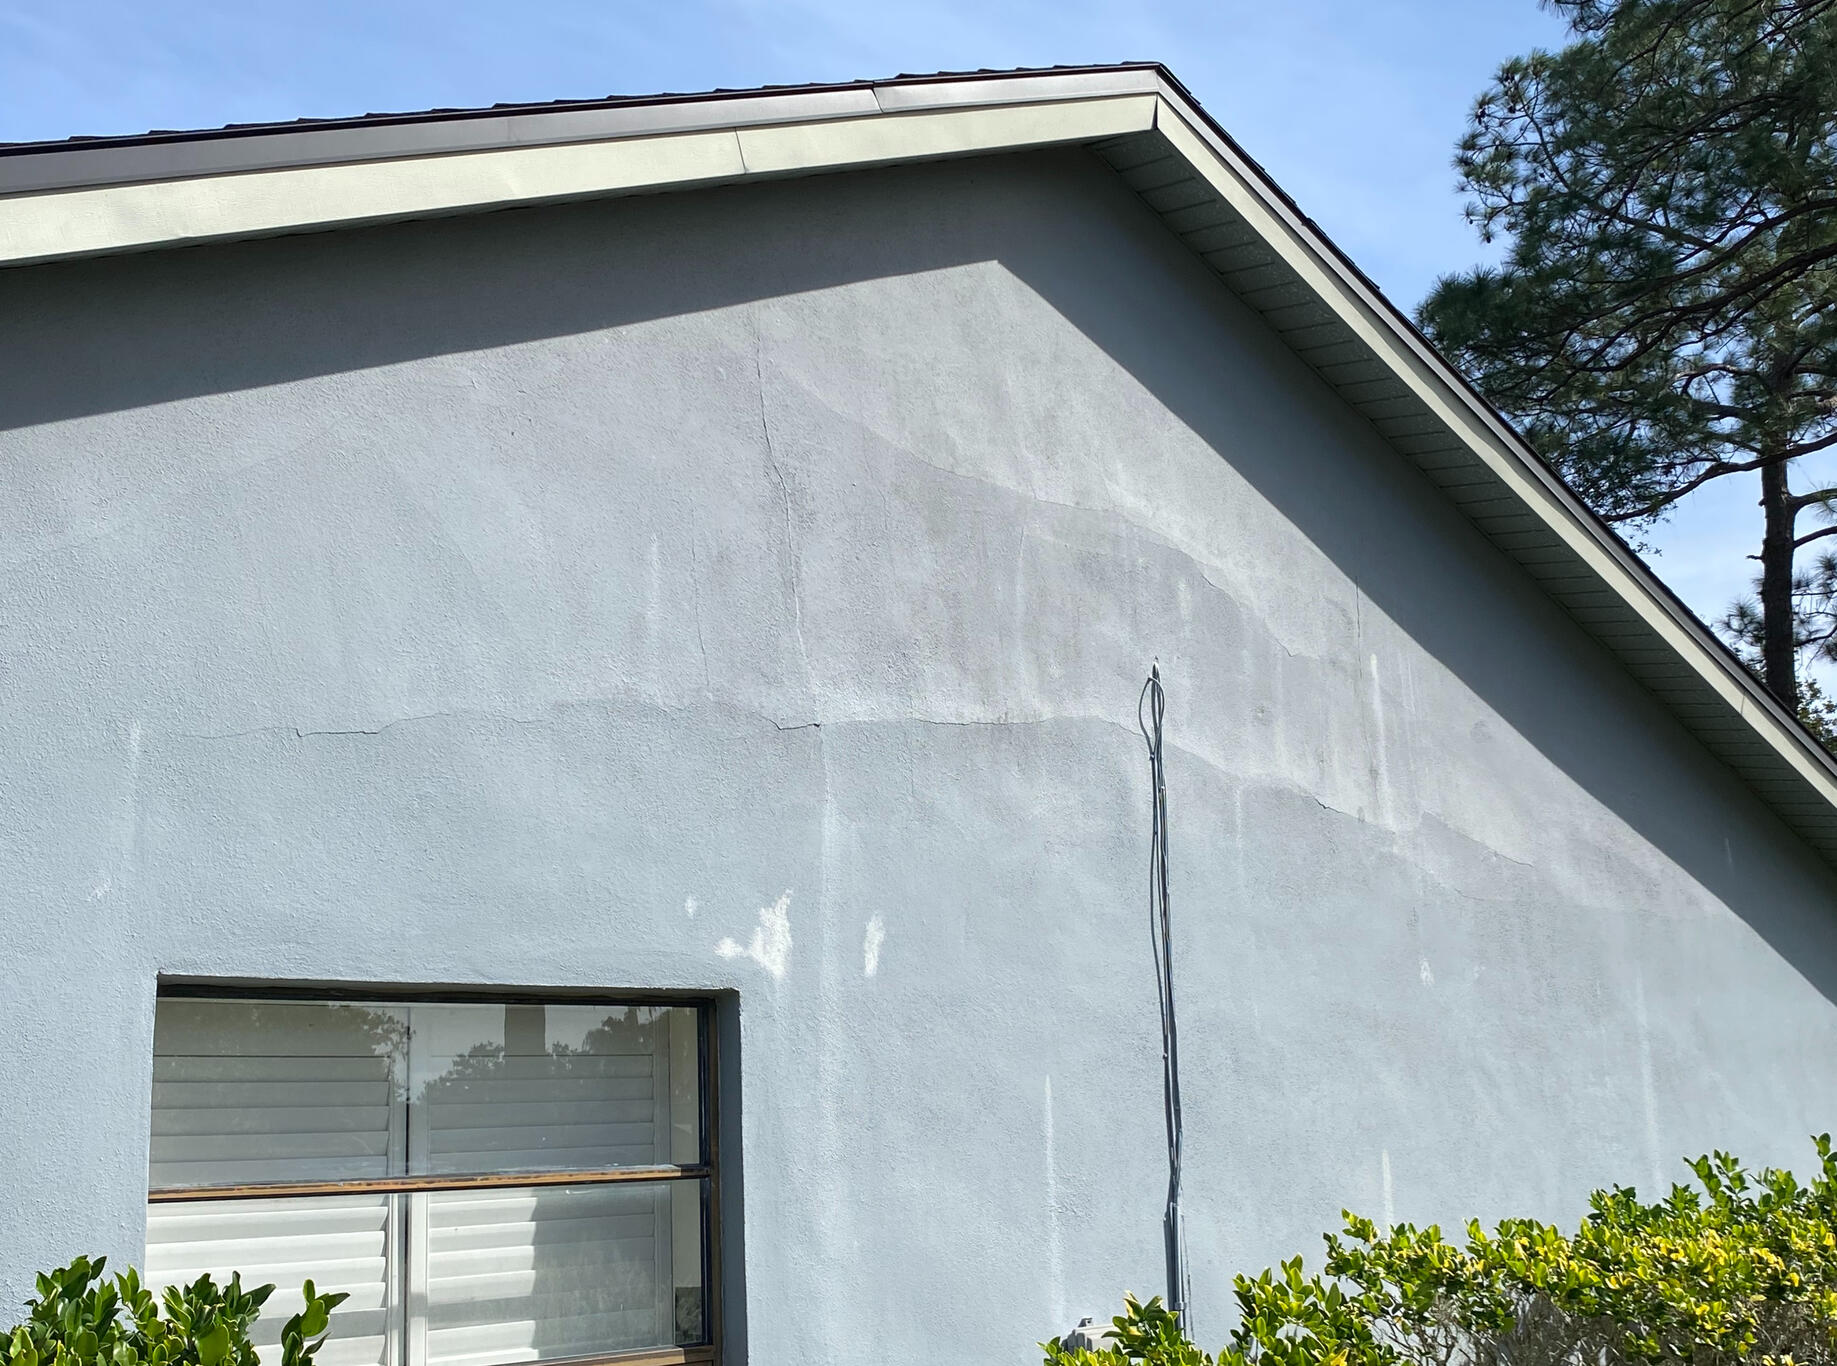
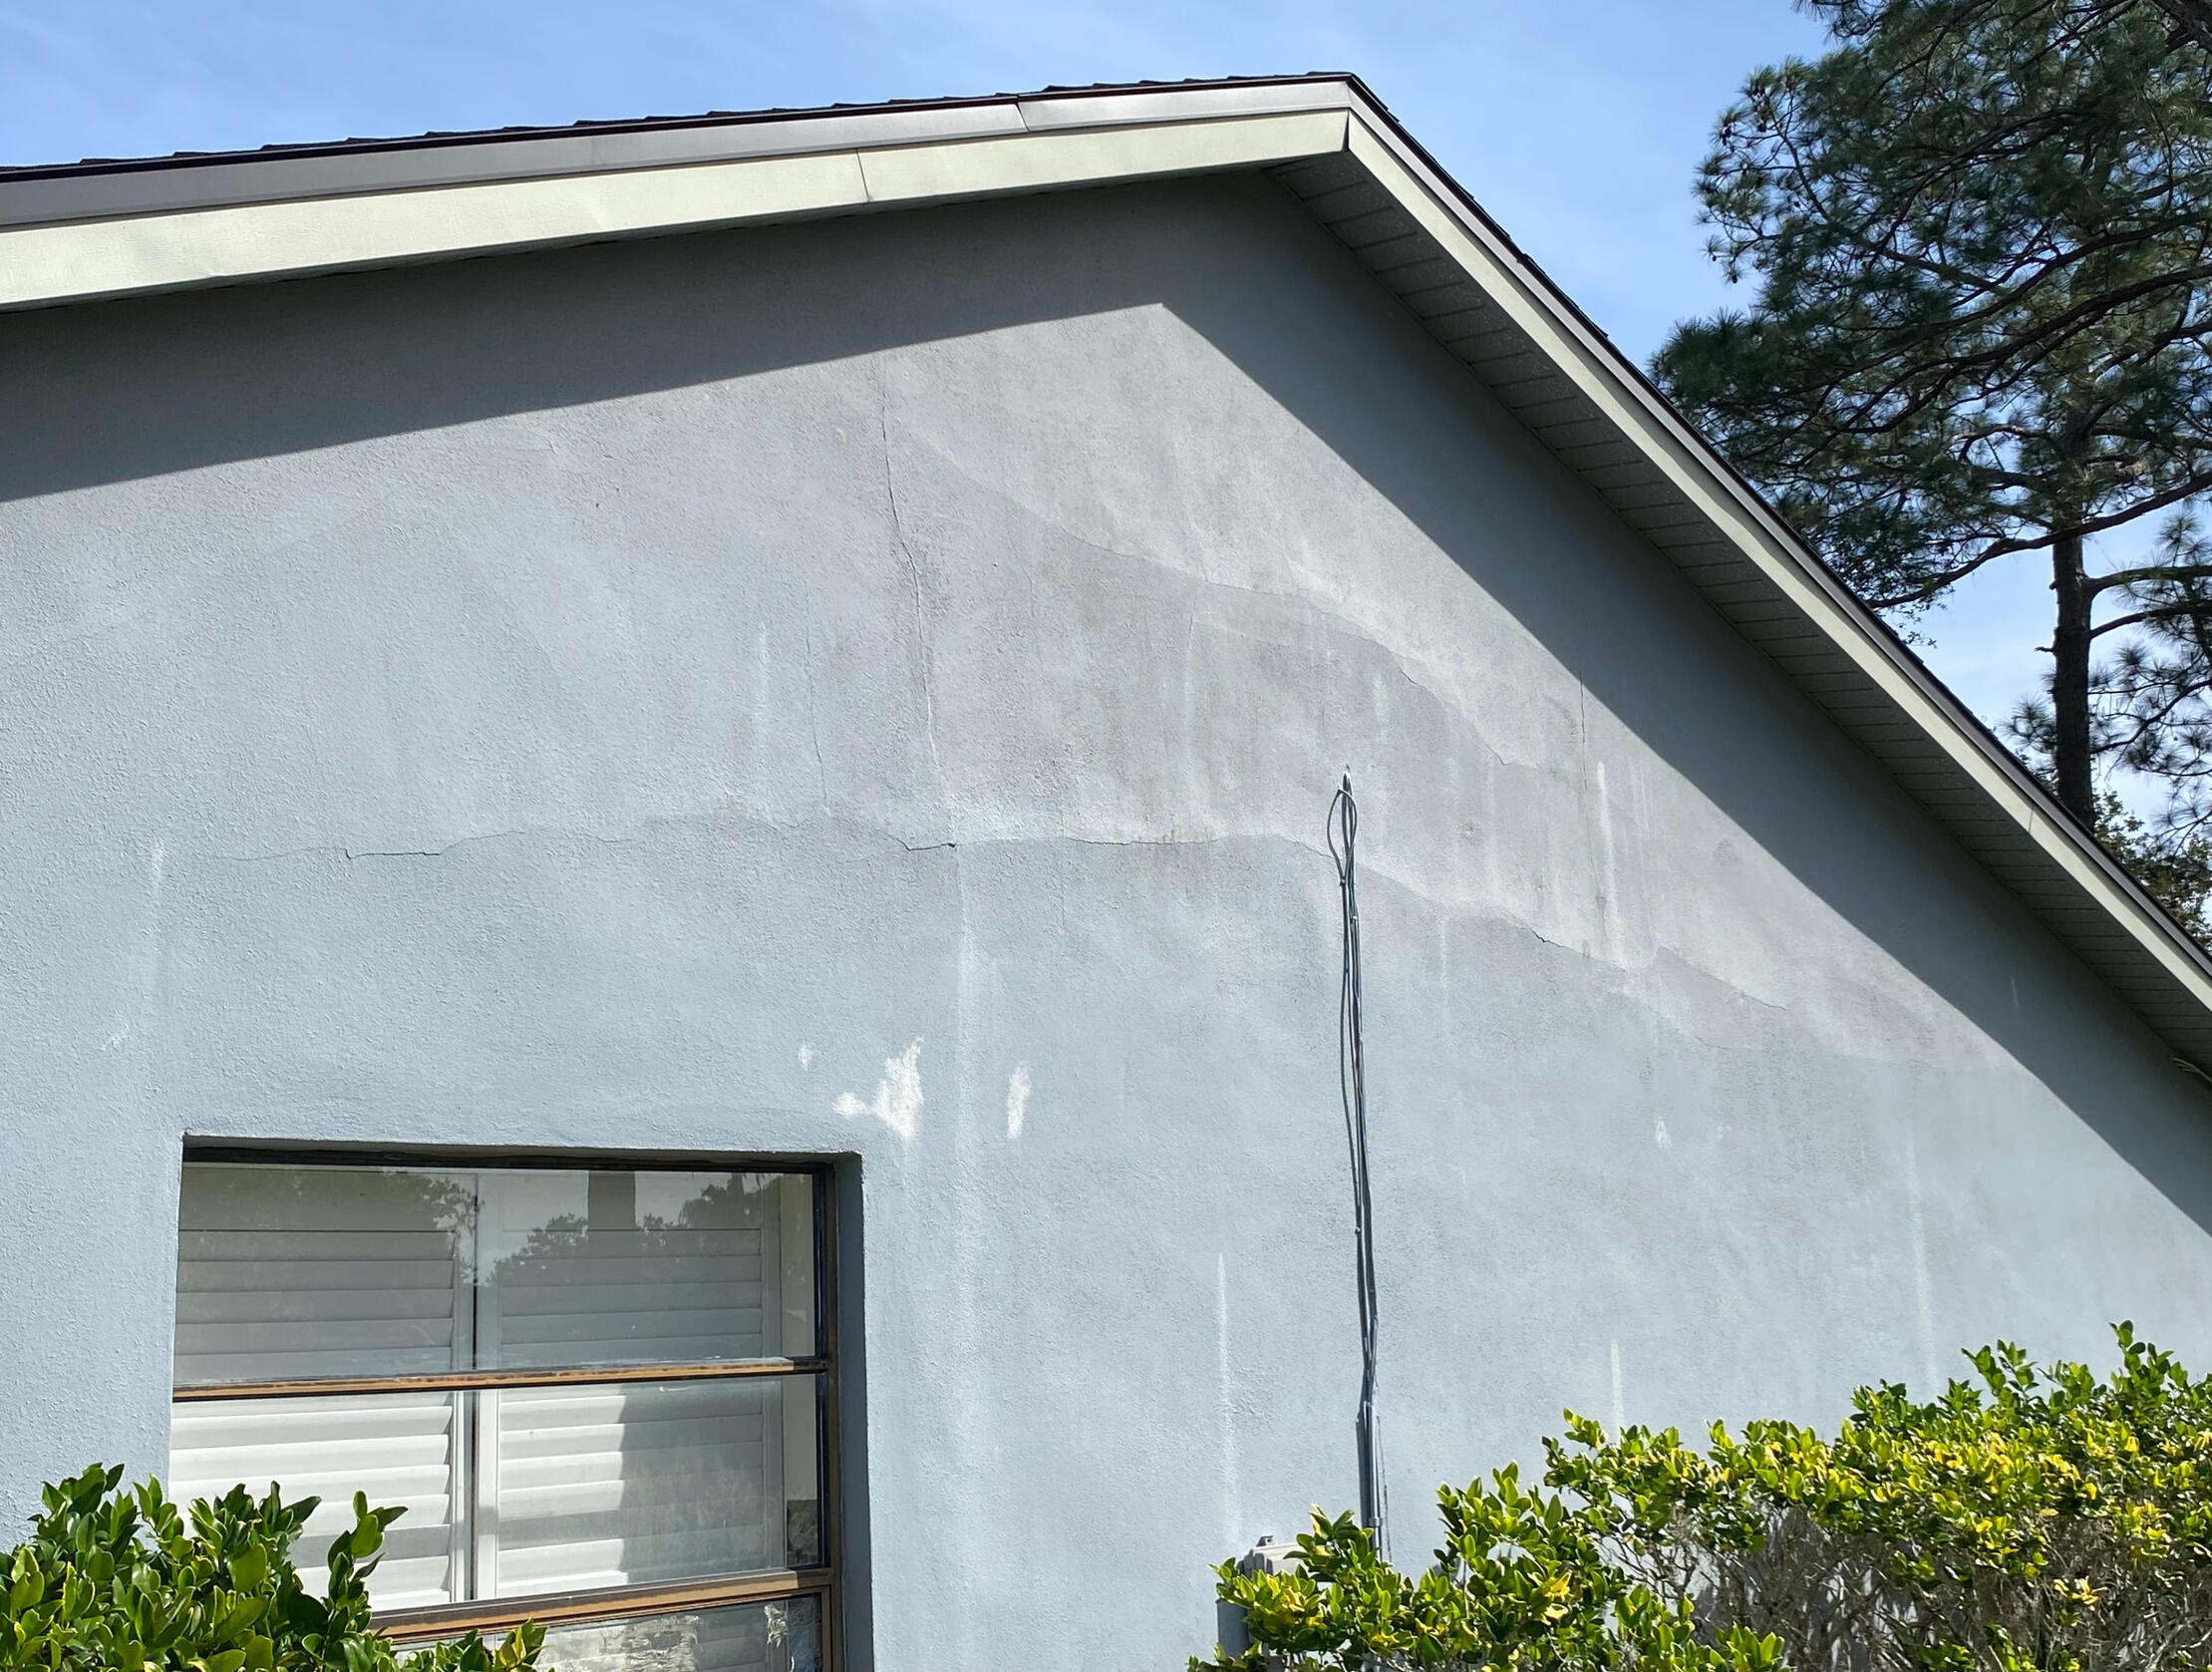
Notice paint peeling off your house, stucco crumbling on the ground, or hairline cracks running along your exterior walls? For Florida homeowners, these aren't just ugly cosmetic problems—they are warning signs that water is getting behind your walls.

When heavy rain and summer storms hit, even tiny wall cracks can pull moisture deep inside your home, leading to rotting wood, mold growth, and expensive structural repairs.

Why Is Paint Peeling and Stucco Crumbling on My House?

If you see stucco flaking, bubbling paint, or wall cracks, Florida weather is usually the main culprit. Strong heat during the day makes your home's exterior walls expand, while sudden rainstorms quickly cool them down. This constant shifting causes paint to lose its grip and stucco to crack over time.

Once a small crack opens, wind-driven storm rain forces water inside, pushing the stucco off the wall from the inside out and causing paint to peel, bubble, or pop off.

The Hidden Danger: Water Leaking Behind Exterior Walls

When water gets behind cracking stucco, it gets trapped. It can't dry out fast enough during Florida's humid months.

Trapped water rots wood studs, rusts internal metal mesh, ruins drywall inside your home, and causes dangerous mold. What starts as a small hairline wall crack can quickly turn into thousands of dollars in hidden water damage after a big hurricane or summer storm.

Common Signs of Exterior Wall and Stucco Damage

Walk around your home and look closely at your exterior walls. Here is what typical wall problems usually mean:

  • Thin Hairline Cracks: Small surface cracks (thinner than a penny) around windows or corners. They seem minor, but they let rain seep in if left unsealed.
  • Paint Peeling or Bubbling: Clear proof that moisture is trapped behind the paint layer and trying to push its way out.
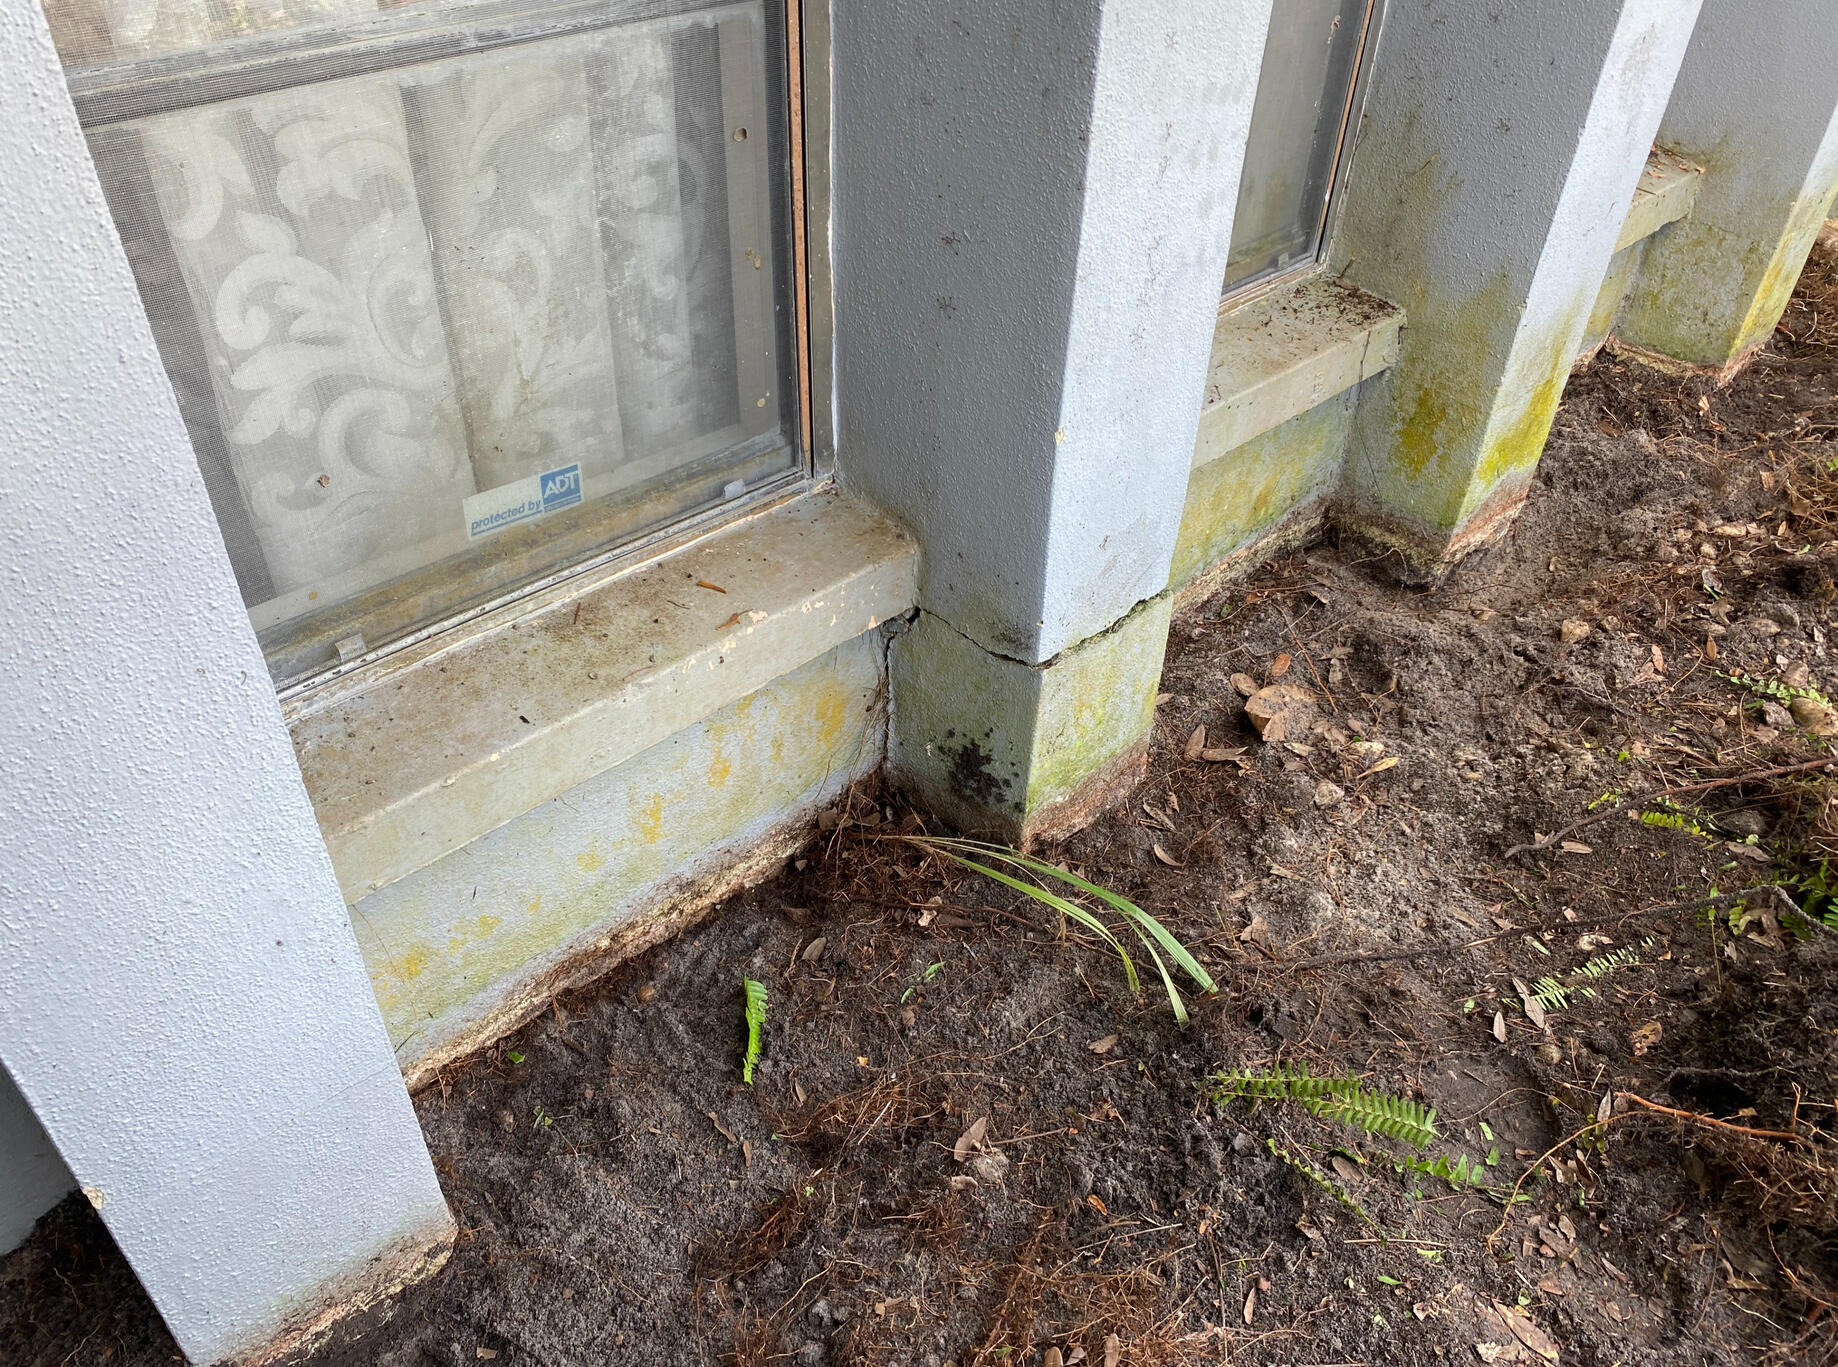
  • Stucco Crumbling or Flaking Off: Means water has already rusted the metal backing or ruined the bond holding the stucco to your home.
  • Large Jagged or Stair-Step Cracks: Cracks that follow the outline of concrete blocks underneath, showing active shifting or major wall stress.
  • Brown Stains or Water Marks: Discolored patches mean water is running down inside the wall every time it rains.

How to Stop Water Damage Before the Next Big Storm

Protecting your exterior walls from heavy weather requires taking care of small issues before storm season arrives:

1. Fix Overflowing Gutters and Ground Drainage

Clogged or leaking gutters dump hundreds of gallons of water directly against your house foundation. Ground water then wicks straight up into your bottom stucco layers, causing them to crack, crumble, and rot.

2. Seal Outside Wall Cracks Promptly

Don't ignore small cracks. Fill surface gaps with high-quality flexible exterior sealants designed to handle wall movement without breaking.

3. Use Waterproof Exterior Coatings

Regular house paint isn't always enough. High-grade elastomeric coatings bridge small cracks and form a thick, waterproof shield that stops rain dead in its tracks.

Protect Your Home’s Complete Exterior Shield

Stopping water damage takes more than patching a single crack. True storm protection means keeping your entire home dry—from sealing cracked outside walls to keeping your rain gutters clean and steering runoff away from your foundation.

Is Stucco Crumbling or Paint Peeling on Your House?

Don't let a small crack turn into a costly water damage repair. Contact Storm Prepperz today to schedule an exterior wall inspection and protect your home before the next storm hits!

Schedule Your Wall Inspection

Should You Paint Exterior Stucco or Use Pre-Colored Stucco Mix?

Planning an exterior home renovation or fixing up your house walls? Homeowners usually face a big choice: should you put up plain grey stucco and paint over it, or use color-tinted stucco where the color is mixed right into the cement before it goes on the wall?

While painting outside walls is very common, mixing color directly into your stucco creates a solid, long-lasting finish that won't chip off or peel—especially in hot sun, heavy humidity, and rainy Florida weather.

What Is Pre-Colored Stucco Mix?

Pre-colored (or integrally colored) stucco means dye or mineral pigment is mixed directly into the wet cement. Instead of sitting on top of the wall like a thin skin of paint, the color goes all the way through the top coat of your stucco.

Why Exterior House Paint Peels Off Stucco

Regular exterior house paint creates a thin rubbery layer over your outside walls. But concrete walls need to breathe. When rain or ground moisture gets behind your walls, hot Florida sun bakes the wall and forces trapped water outward against the paint.

That water pressure pushes the paint off the wall, causing paint bubbling, blistering, and peeling. Worse, whenever painted stucco gets chipped or scratched by lawn mowers or storm debris, ugly grey concrete shows right through.

4 Reasons Pre-Colored Stucco Lasts Longer Than Exterior Paint

Mixing color straight into the stucco completely changes how your home handles heat, rain, and wear:

  • No More Peeling or Bubbling Paint: Because the color comes from natural mineral powder inside the cement rather than a layer of latex paint, moisture passes right through without pushing paint off the wall.
  • Wont Fade in Strong Sunlight: Hot summer sun breaks down regular house paint quickly, causing chalking and fading. Pre-colored stucco uses UV-resistant minerals that hold their shade for decades.
  • Scratches and Chips Don't Show: If a flying branch or lawn tool scrapes your wall, you won't see a grey mark. The color goes all the way through the layer.
  • Stops the Repainting Cycle: You won't have to hire painters every 5 to 7 years to scrape, prime, and repaint your entire house exterior.

When Painting Outside Walls Still Makes Sense

Even though colored stucco mix lasts longer, regular exterior painting can still be the better option if:

  • You Like Changing House Colors: If you prefer updating your home's outside color scheme every few years, paint is much easier to change.
  • Matching Small Wall Patches: If you are fixing a small crack on an older home, matching existing paint is usually easier than trying to match custom stucco mix batches.
  • You Want Very Bright Colors: Very dark or extra-bright accent colors (like deep blue or bright red) are hard to mix into natural cement without weakening the stucco.

Keep Your Exterior Walls Dry and Protected

Choosing the right wall finish is just one step to keeping your home in great shape. Stopping water damage also requires sealing wall cracks, keeping rain gutters clean, and making sure water drains away from your foundation.

Fixing Up Exterior Walls or Planning a Stucco Repair?

Don't waste money on paint that will peel off in a few years. Contact Storm Prepperz today to schedule an exterior inspection and find the longest-lasting solution for your home!

Schedule Your Wall Inspection
Learning Center/Siding & Flashing/Fiber Cement vs. Vinyl
Exterior Siding Guide

Will High Winds Blow Off Vinyl Siding or Fiber Cement Planks?

Planning a siding project or wondering if your home's outside walls can survive the next big hurricane or summer storm? When strong winds hit, your siding is the main shield keeping wind and rain from tearing into your house.

While vinyl siding and fiber cement planks (like Hardie board) are two of the most popular house siding options, they behave completely differently when strong wind gusts roll in. Here is what homeowners need to know about how wind blows siding off houses, which material holds up best, and where water leaks in during heavy weather.

How High Winds Tear Siding Off a House

When severe weather hits, wind doesn't just push against the front of your home—it creates a powerful vacuum (suction) along the side walls, corners, and roofline. As wind whips around corners, it pulls the siding outward, trying to rip panels off the wall.

If wind-driven rain gets behind loose siding, the pressure pushes the boards from the inside while pulling them from the outside, causing whole sections of siding to pop off instantly.

Why Siding Unzips and Blows Away

Vinyl siding is made of thin, flexible plastic that hooks together in long rows. During high winds, once one corner unhooks or loose nails pull free, the wind catches the underside and "unzips" the whole side of the house in seconds.

3 Common Spots Where Siding Fails During Storms

1. Where Siding Boards Overlap

The seams where horizontal siding panels overlap are huge weak spots when storm winds hit:

  • Vinyl Siding: Vinyl expands and shrinks as the temperature changes, so installers must leave gaps between panels. During heavy rainstorms, strong winds blow water straight through these open seams, soaking the wall behind it.
  • Fiber Cement Siding: Fiber cement boards are thick, heavy, and rigid. They don't bend or flap in the wind, keeping overlapping seams tight and keeping wind-driven rain out.

2. Around Windows and Door Frames

Wind blows harder around windows and house corners than against flat walls:

  • Vinyl Systems: Vinyl uses plastic trim pieces (J-channels) around windows to catch water. Under high wind pressure, rain gets blown right past these channels, leaking straight into window framing and interior drywall.
  • Fiber Cement Systems: Fiber cement uses solid, heavy trim boards with metal flashing over windows. This sturdy setup stays locked in place during strong gusts, stopping water from leaking inside.

3. Bottom Edge Near the Ground

The bottom row of siding takes the worst beating from wind gusts and splashing rain:

  • Vinyl Starter Strips: If the bottom row of vinyl isn't clipped tightly into the metal starter strip along the foundation, upward wind gusts will unhook it. Once the bottom row comes loose, the wind catches the rest of the wall.
  • Fiber Cement Bottom Rows: Fiber cement uses solid starter strips nailed directly into heavy wall studs. Rain runs off the bottom edge without loosening or pulling the planks off the wall.

Siding Comparison: Fiber Cement vs. Vinyl Siding

Feature / ConcernFiber Cement SidingStandard Vinyl Siding
Wind Speed RatingHolds strong up to 130–150+ MPHRated up to 110 MPH (can blow off in severe storms)
Flexing and Flapping in WindNone (Solid, heavy composite board)High (Flexible plastic that rattles and flexes)
Damage from Flying Storm DebrisHigh resistance to impacts and hailProne to cracking, denting, or snapping
Main Reason It FailsImproper nailing during original installationPanels unhooking and unzipping off the wall
How Water Gets InsideImproper gaps around trim or foundationRain blown through open seams and plastic window trim

Pre-Storm Checklist: How to Check Your Siding

Whether your home has vinyl siding or fiber cement, taking a quick walk around your house before hurricane season can save you from massive storm damage:

  • Check for Loose Nails or Pop-Outs: Look for loose nails or popping boards along high-wind areas like house corners and top gable ends.
  • Inspect Window Caulking: Check around window and door trim to make sure old caulk isn't cracked, peeling, or missing.
  • Keep Ground Clearances: Make sure soil, mulch, or concrete patios stay at least 6 inches below the bottom edge of your siding so water doesn't soak upward into your walls.

Is Your House Siding Ready for High Winds?

Don't wait for a storm to tear off loose siding or leak water into your walls. Contact Storm Prepperz today to schedule a complete exterior siding inspection and protect your home before the next storm hits!

Schedule Your Wall Inspection
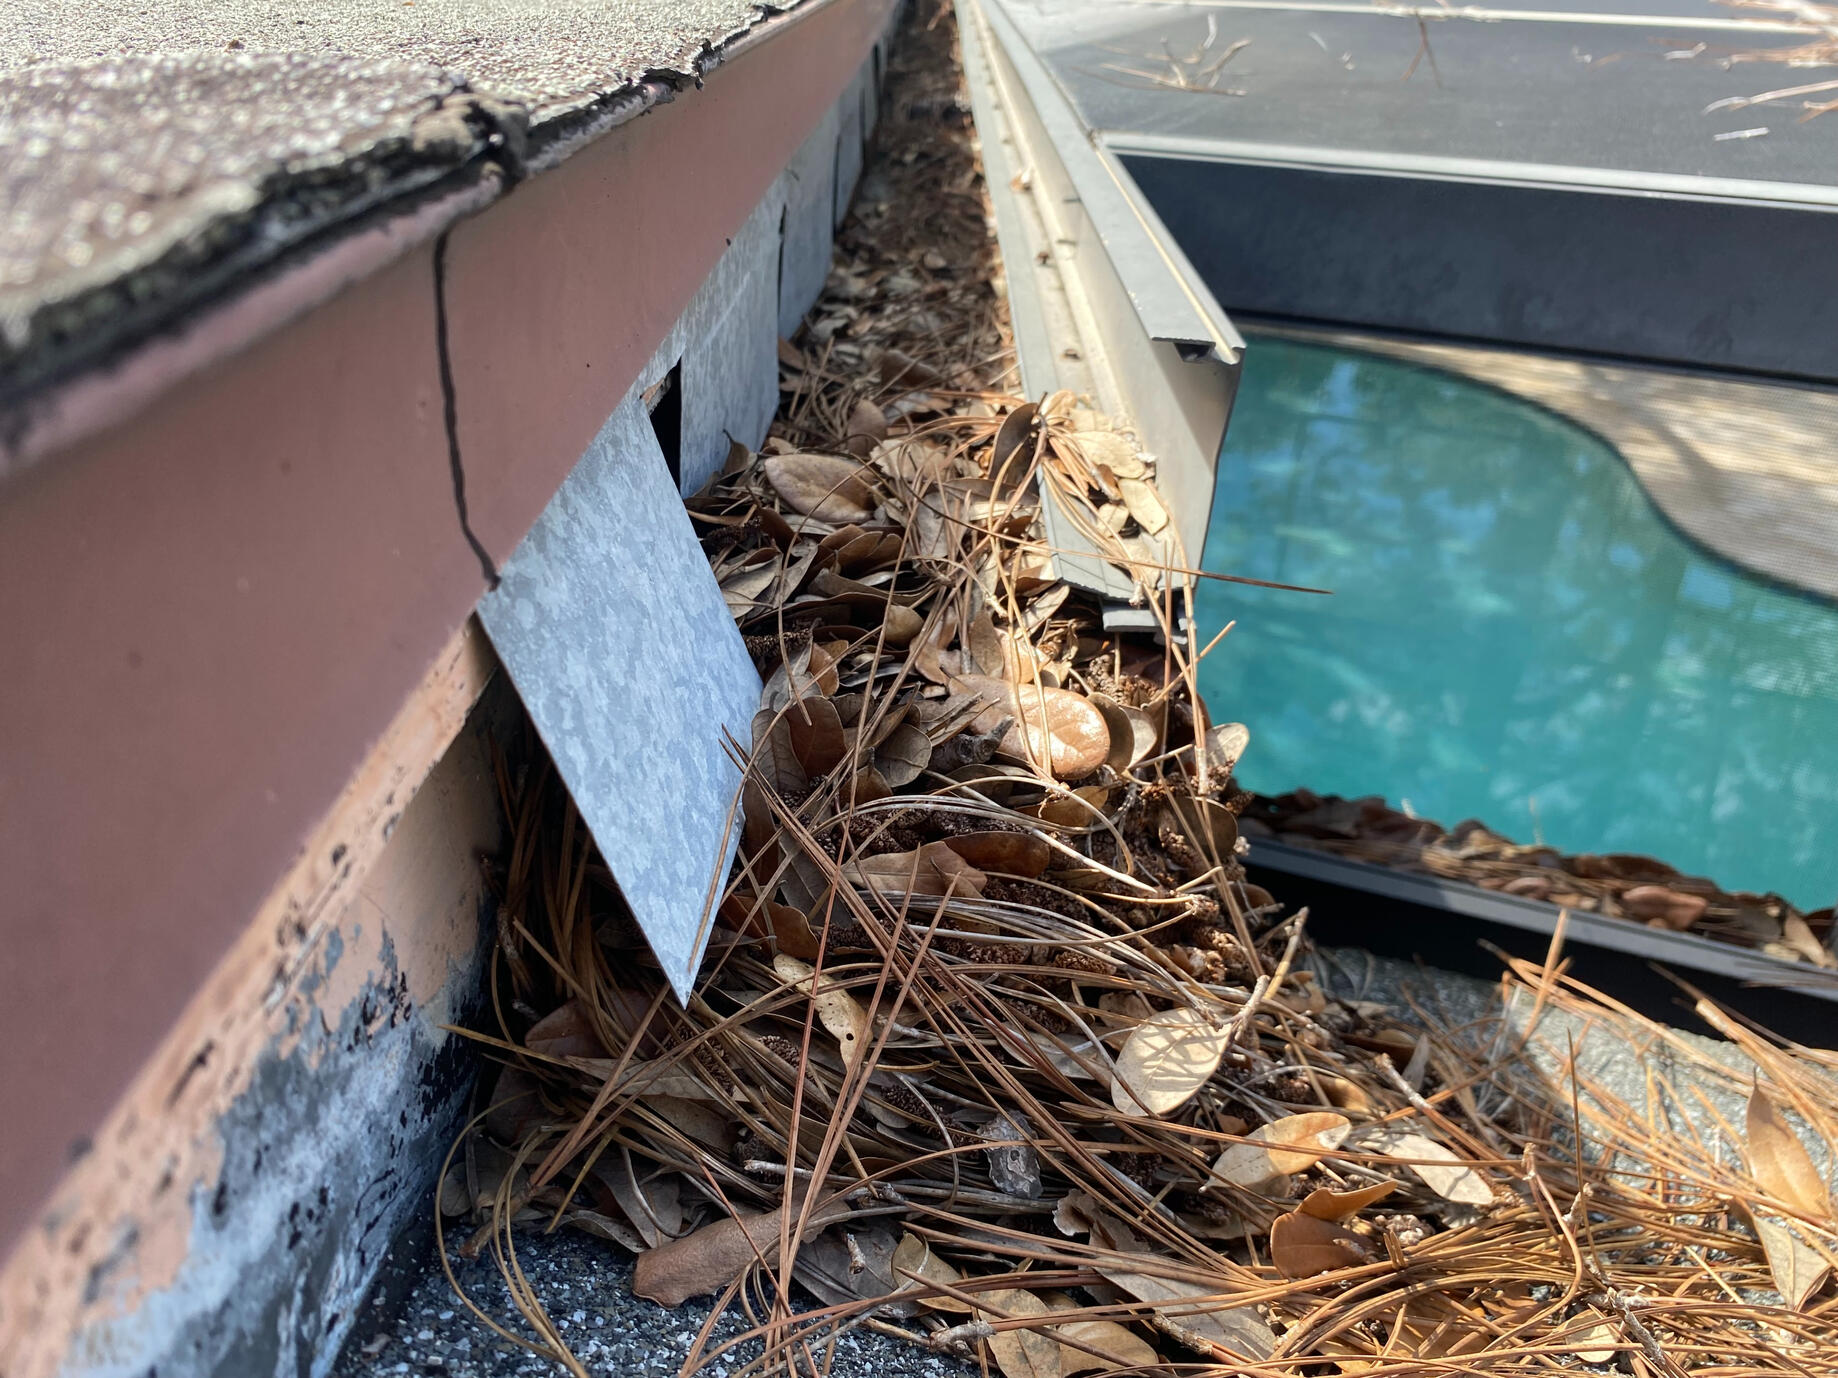
Gutters filled with debris

How a $300 Gutter Realignment Prevented a $10,000 Garage Flood in Dunedin, FL

Picture this classic Florida scenario: A heavy downpour hits Dunedin—just 30 minutes of intense summer rain. For most homeowners, it is just background noise. But for one local resident today, it meant a panicked dash to the garage as a massive wall of water poured straight over a sagging gutter, pooled against the threshold, and began creeping under the garage door.

When Pinellas County homeowners encounter garage flooding or threshold water pooling, they usually fear the worst—assuming they need expensive concrete regrading, foundation sealing, or heavy French drain installations. However, water management is usually far simpler. More often than not, the culprit is an overlooked gutter system failing at its most basic mechanical job.

The Anatomy of a Near-Miss Flood Failure

Upon inspecting the Dunedin property today, the structural cause was glaringly obvious yet entirely critical:

  • The Debris Blockage: The front gutter run was completely choked off at the downspout drop outlet, bringing water flow to a complete standstill.
  • Hardware Shearing: Years of thermal movement and heavy water loads had caused traditional spikes and ferrules to snap free, leaving the fascia unsecured.
  • Reversed Slope (Negative Pitch): Without continuous support, the gutter sagged in the center, reversing the pitch away from the downspout and trapping hundreds of pounds of standing water.

As torrential rain hit the roof, the clogged, sagging channel overflowed instantly, sending a continuous sheet of water cascading down the front facade and directly into the garage entry line.

The $300 Repair vs. $10,000+ Restoration Costs

Fixing this emergency did not require tearing up the driveway or installing complex drainage pumps. Our field team performed a complete mechanical resetting of the system:

  • Cleared and flushed all organic blockages and downspout drops.
  • Removed failed, outdated spike-and-ferrule fasteners.
  • Installed heavy-duty screw-in hidden hangers directly into the rafter tails for maximum load capacity.
  • Re-sloped and re-aligned the gutter pitch to guarantee a high-velocity flow path away from the foundation.

The total investment for parts and professional labor was $300.

That single targeted repair instantly eliminated the garage flood risk, restored the gutter's structural integrity, and saved the homeowner from thousands of dollars in emergency water extraction, drywall repairs, and mold remediation.

Diagnostic Checklist: Minor Maintenance vs. Major Flood Risks

Issue ObservedRoot Mechanical CausePotential Damage RiskCost to Fix Early
Water pouring over gutter edges during rainClogged downspout or flat/reversed pitchGarage flooding, soil erosion, foundation cracks$150 - $350
Visible gap between gutter and fascia boardFailed spikes or missing hidden hangersRotting fascia boards and soffit destruction$200 - $400
Water pooling near foundation/garage doorShort downspout extensions or poor slopeSlab intrusion, interior drywall rot, mold growth$100 - $300

Essential Takeaway for Florida Homeowners

Ahead of severe weather and hurricane season in Central Florida, homeowners naturally focus on high-ticket upgrades like roof replacements or hurricane shutters. However, storm readiness is all about perimeter water control.

A single broken bracket, loose hanger, or clogged drop outlet can quickly cascade into major structural moisture intrusion. Routine gutter maintenance and pitch adjustments are not just simple home chores—they are your property's primary line of defense against costly flood damage.

Is Your Gutter System Ready for the Next Storm?

Don't wait for the next downpour to flood your garage or entryway. Schedule a quick on-site inspection today to evaluate your roof runoff, gutter pitch, and perimeter drainage defenses.

Schedule Your Inspection

Complete Your Drainage System: Why Downspout Redirection Is Essential

Installing seamless gutters is one of the single best moves a property owner can make to guard against heavy rain. However, a common installation oversight leaves many homes at risk: letting downspouts dump roof runoff just two feet from the foundation slab.

Collecting rainwater off your roof is only half the battle. Without a dedicated redirection network, gutters merely capture massive roof volume and concentrate it into localized blast zones right along your exterior perimeter.

The "Dump & Run" Downspout Trap

During a standard Florida downpour, thousands of gallons of water cascade off a residential roof.

When a home lacks gutters, rain drips along the entire roofline, distributing moisture across the perimeter. But when you install gutters with standard elbows that terminate two feet from the wall, you force that entire water volume into four or five high-pressure discharge points.

Leaving concentrated runoff at the base of your home causes several immediate issues:

  • Soil Erosion & Trenching: Heavy downspout flow gouges deep trenches in dirt beds, washes away mulch, and exposes shallow plant roots.
  • Perimeter Pooling & Puddling: Trapping standing water next to the foundation creates mud pits that ruin turf and breed mosquitoes.
  • Landscape & Foundation Stress: Constant water saturation rots ornamental plant roots and increases moisture pressure around exterior slab edges.

The Core Solution: Two-Part Water Management

A reliable residential drainage strategy relies on two distinct components:

  • 1. The Collection Network: Roof gutters and vertical downspouts gather rain from roof valleys and bring it safely down to ground level.
  • 2. The Redirection Network: Extension pipes, underground drainage lines, and surface channels transport that collected water away from the building.

Gutters catch the storm water; redirection controls where it discharges.

Best Downspout Redirection Solutions Compared

Redirection MethodIdeal Yard ConditionsPrimary BenefitMaintenance Needs
Underground PVC & Pop-Up EmittersSloped lawns discharging toward swales or streetsHides drainage underground, zero trip hazardOccasional debris clearing at pop-up cap
Direct Catch BasinsHigh-volume roof corners & downspoutsTraps silt and leaves before entering main pipesPeriodic emptying of sediment basket
Shallow Curtain DrainsFlat yards with low-lying perimeter spotsIntercepts both surface runoff and shallow ground moistureMinimal; protected by filter fabric
Regraded Rock SwalesNatural ground slopes with decorative landscape bedsBlends functional water runoff into river rock designOccasional leaf blowing out of rock beds

4 Professional Downspout Redirection Options

1. Underground Solid PVC Lines & Pop-Up Emitters

Downspout bases connect directly to solid, smooth-wall PVC pipe buried beneath turf. Water flows away from the structure via gravity and discharges safely in the lawn or street swale through a spring-loaded pop-up emitter.

2. Direct Catch Basins

Positioning a catch basin under the downspout captures initial roof debris and sediment while giving heavy runoff a clean entry point underground.

3. Shallow Curtain Drains

In yards where downspout water collects in low lawn spots, a shallow curtain drain—a gravel-filled trench with a perforated pipe—intercepts surface water and channels it away continuously.

4. Regraded Rock Swales

Combining river rock channels with minor ground regrading creates an attractive natural creek bed that directs downspout runoff away from living areas without pooling.

Protecting Your Exterior Investment

Gutters without a proper discharge path leave your home only half-protected. By completing your water management system with targeted downspout redirection, you eliminate mud, protect landscaping, and ensure heavy rain flows safely away from your foundation.

Need An In-Person Drainage Inspection?

Have our team evaluate your property grading, gutter capacity versus roof area, and ground drainage pathways to protect your home from heavy rainfall.

Schedule My Inspection